Archive for June, 2009
Jun
How to do a system restore
Posted by Comments Off on How to do a system restore
A great tool built into Windows Operating Systems is the System Restore function. Basically what system restore does is it takes a screen shot of your computers important files from time to time so if anything goes wrong with your computer then it can be rolled back to a time when it was working just the way you liked it.
PLEASE NOTE : All files and folders should be backed up before trying any of the following steps.
For Restoring Windows XP:
- Make sure you are logged in as Administrator
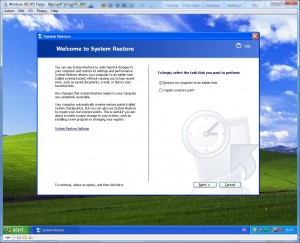
- Press the Start button, move to All Programs, move to Accessories, scroll down to System Tools and click on System Restore.
- When the program starts it should look like the screenshot below

- Make sure that the Restore my computer to an earlier time is checked. Click on the Next button.
- Now select a time your computer was at a healthy point on the calendar. ( dates that the computer can revert back to are usually marked in bold font). Click Next
- A confirmation page will now display what time it is going back to before it restores.
- Your computer will now restart. Log in as Administrator again and your computer will now be at a point to where you wanted it.
For Restoring Windows Vista:
- Make sure you are logged in as Administrator
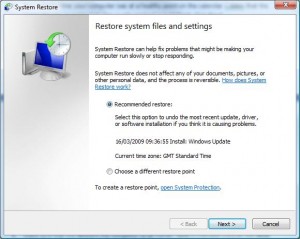
- Press the Start button, move to All Programs, move to Accessories, scroll down to System Tools and click on System Restore. Click Continue on the UAC warning window
- When the program starts it should look like the screenshot below

- Make sure that the Choose a different restore point button is checked. Click on the Next button. (You can also use the Recommend restore option and let windows choose a date to when your computer was healthy.)
- Now select a time your computer was at a healthy point on the calendar. ( check the Restore points older than 5 days box for older points). Click Next
- A confirmation page will now display what time it is going back to before it restores.
- Your computer will now restart. Log in as Administrator again and your computer will now be at a point to where you wanted it.
If you have any problems with these steps or any other problems please don’t hesitate to call one of our qualified technicians and we will be delighted to perform the required steps to deal with your problem.
| Lo-Call 1890 219 219 |Business Hours: Monday – Friday 9:45 to 6:30 & Saturday 9:00 to 12:00 |
- Bookmark :
- Digg
- del.icio.us
- Stumbleupon
- Redit it
Jun
Cannot access the internet with Norton Internet Security 2008
Posted by Comments Off on Cannot access the internet with Norton Internet Security 2008
We had a laptop come in today with a problem with accessing the internet. It was a dell XPS laptop and around 6 months old. Norton Internet Security 2008 came supplied with the Laptop. We tried to access the firewall settings on NIS but it was giving us a message informing us that we had to be an administrator to access the firewall settings even though we were logged in using an administrator account. We believed it had something to do with the software so we uninstalled NIS and Internet Explorer worked fine. We tried to install it again but still the same problem. The only way to fix this problem was to download an update of NIS 2009.
Steps on updating Norton Internet Security:
Click on the link below:
- Click on the orange “BEGIN” button at the top of the page
- There should be two pull-down menus, on the “Select a product” bar highlight Norton Internet Security
- On the “Select a version” select 2008
- Click on “CONTINUE”
- There should be a table on the next page and on the last column called free update, click on the button “DOWNLOAD”
- A window will appear with a “START DOWNLOAD” button, click on it.
- When the File Download screen appears click on “RUN”
- In the UAC window click “CONTINUE”
- When the computer downloads the file click the icon on your desktop to run the update and follow the instructions.
If you have any problems with these steps or any other problems please don’t hesitate to call one of our qualified technicians and we will be delighted to perform the required steps to deal with your problem.
| Lo-Call 1890 219 219 |Business Hours: Monday – Friday 9:45 to 6:30 & Saturday 9:00 to 12:00 |
- Bookmark :
- Digg
- del.icio.us
- Stumbleupon
- Redit it
Jun
How to remove Antivirus 360
Posted by Comments Off on How to remove Antivirus 360
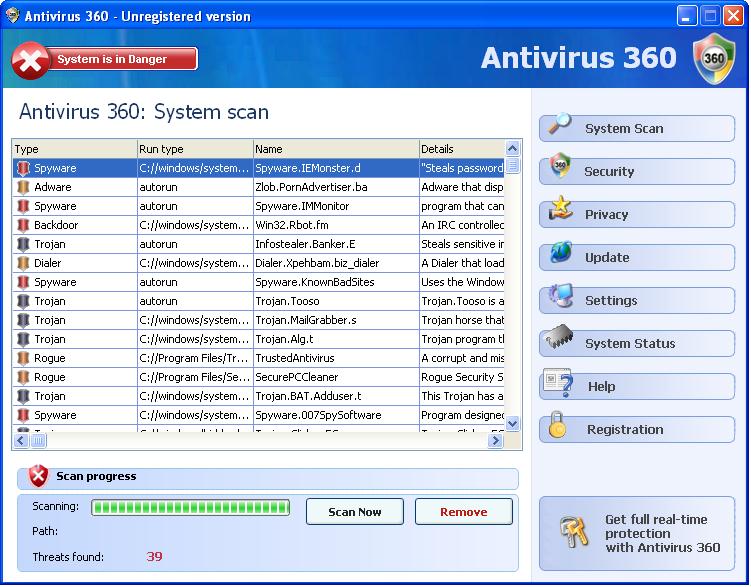
A Virus that has been circulating at the moment is called Antivirus 360 . It is a rogue antispyware that promotes itself as an Antivirus program. It pretends to scan your computer and projects a false page that your computer is infected with hundreds of viruses as shown in the screenshot below:

WARNING:
It will claim to get rid of these viruses by entering your credit card details and paying a simple fee of €60 (PLEASE DO NOT ENTER YOUR DETAILS). It will also imbed an icon in your tool tray with the rest of your programs to look like a legitimate anti virus.

How to Remove the Antivirus 360 Virus:
- First of all you need to download a program called Malwarebytes Anti-Malware and install it on your computer.
- When malwarebytes is finished installing it is important to let it update and then let the program run.
- When Malwarebytes is running perform a quick scan of your system to search for any unwanted guests.
- After the scan is finished click on “Show Results” to look at the infected objects.
- Click on the “Remove Selected” button to get rid of any infections, Malwarebytes may now need to restart the computer it is important you let it do so.
- When the computer restarts close the Malwarebytes and your computer is now clean of the Antivirus 360 program.
- Scan your computer with your usual antivirus program to remove any other threats.
If you have any problems with these steps or any other problems please don’t hesitate to call one of our technicians and we will be delighted to perform the required steps to deal with your problem.
| Lo-Call 1890 219 219 |Business Hours Monday – Friday 9:45 to 6:30 Saturday 9:00 to 12:00 |
- Bookmark :
- Digg
- del.icio.us
- Stumbleupon
- Redit it


